Documentshow-to-register-a-player-at-pisignagecom
How to register a player at pisignage.com
Register a player to manage it at pisignage.com and to get its license
A player must be registered at pisignage.com to be managed there and to get its player license. If you bought licenses after registering the player and it has no license, register it again to generate one.
When you register, the license is generated on the server and emailed to your registered address. It downloads to the player automatically the next time the player contacts the server.
There are two modes:
- Managed: the default, for players controlled from pisignage.com
- License only: for players managed by your own open source server
Register a player in the new UI
- Note the player ID. An unregistered player shows a Welcome screen with its 16-digit player ID, for example 5000-0000-3d88-c52d. See What is player ID.
- Sign in, open Screens in the left menu and click Add Screen at the top of the page.
- Fill in the form: Screen Name, Screen ID (shown on the TV), Group and Timezone. Location, Coordinates, Categories and Notes are optional.
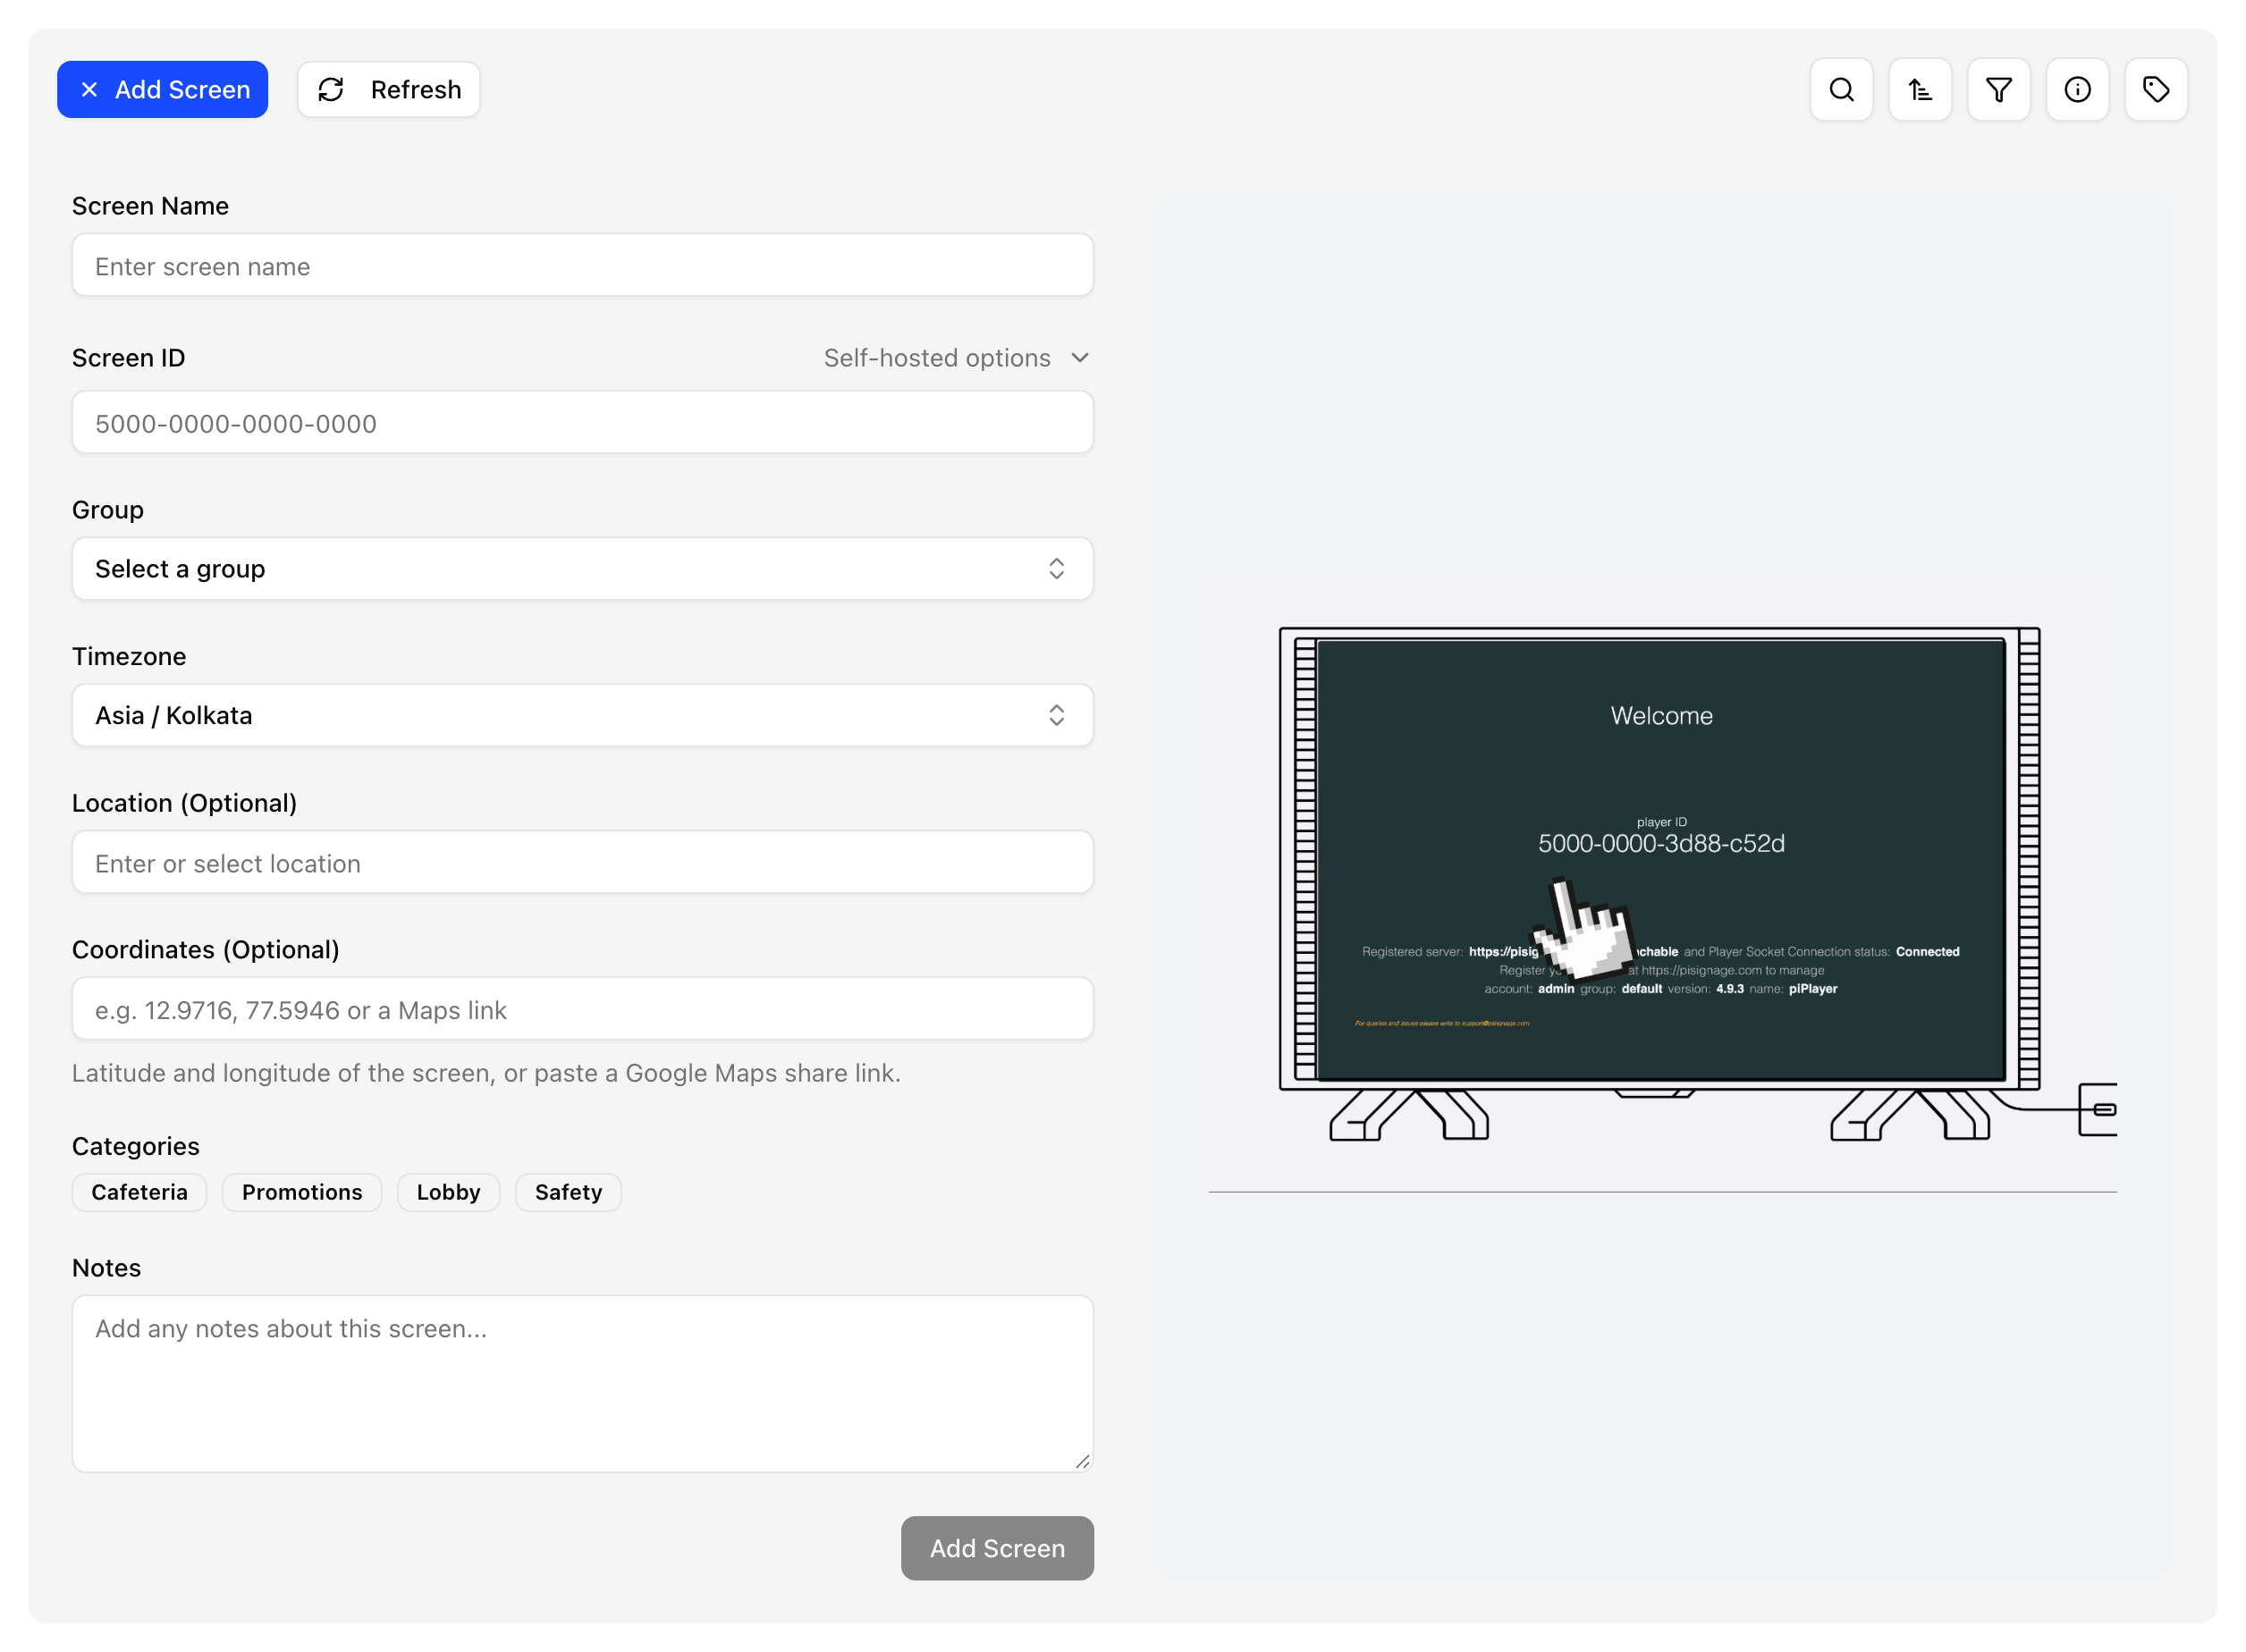
- Click Add Screen at the bottom of the form.
- Check the Screens list. The player appears and shows Online once it contacts the server.
Screens covers the fields in more detail.
License only, for a self-hosted server
Use this when your own open source server manages the player. The player is not added to pisignage.com.
- Click Add Screen, then click Self-hosted options next to the Screen ID field.
- Turn on Need to generate a self-hosted license?
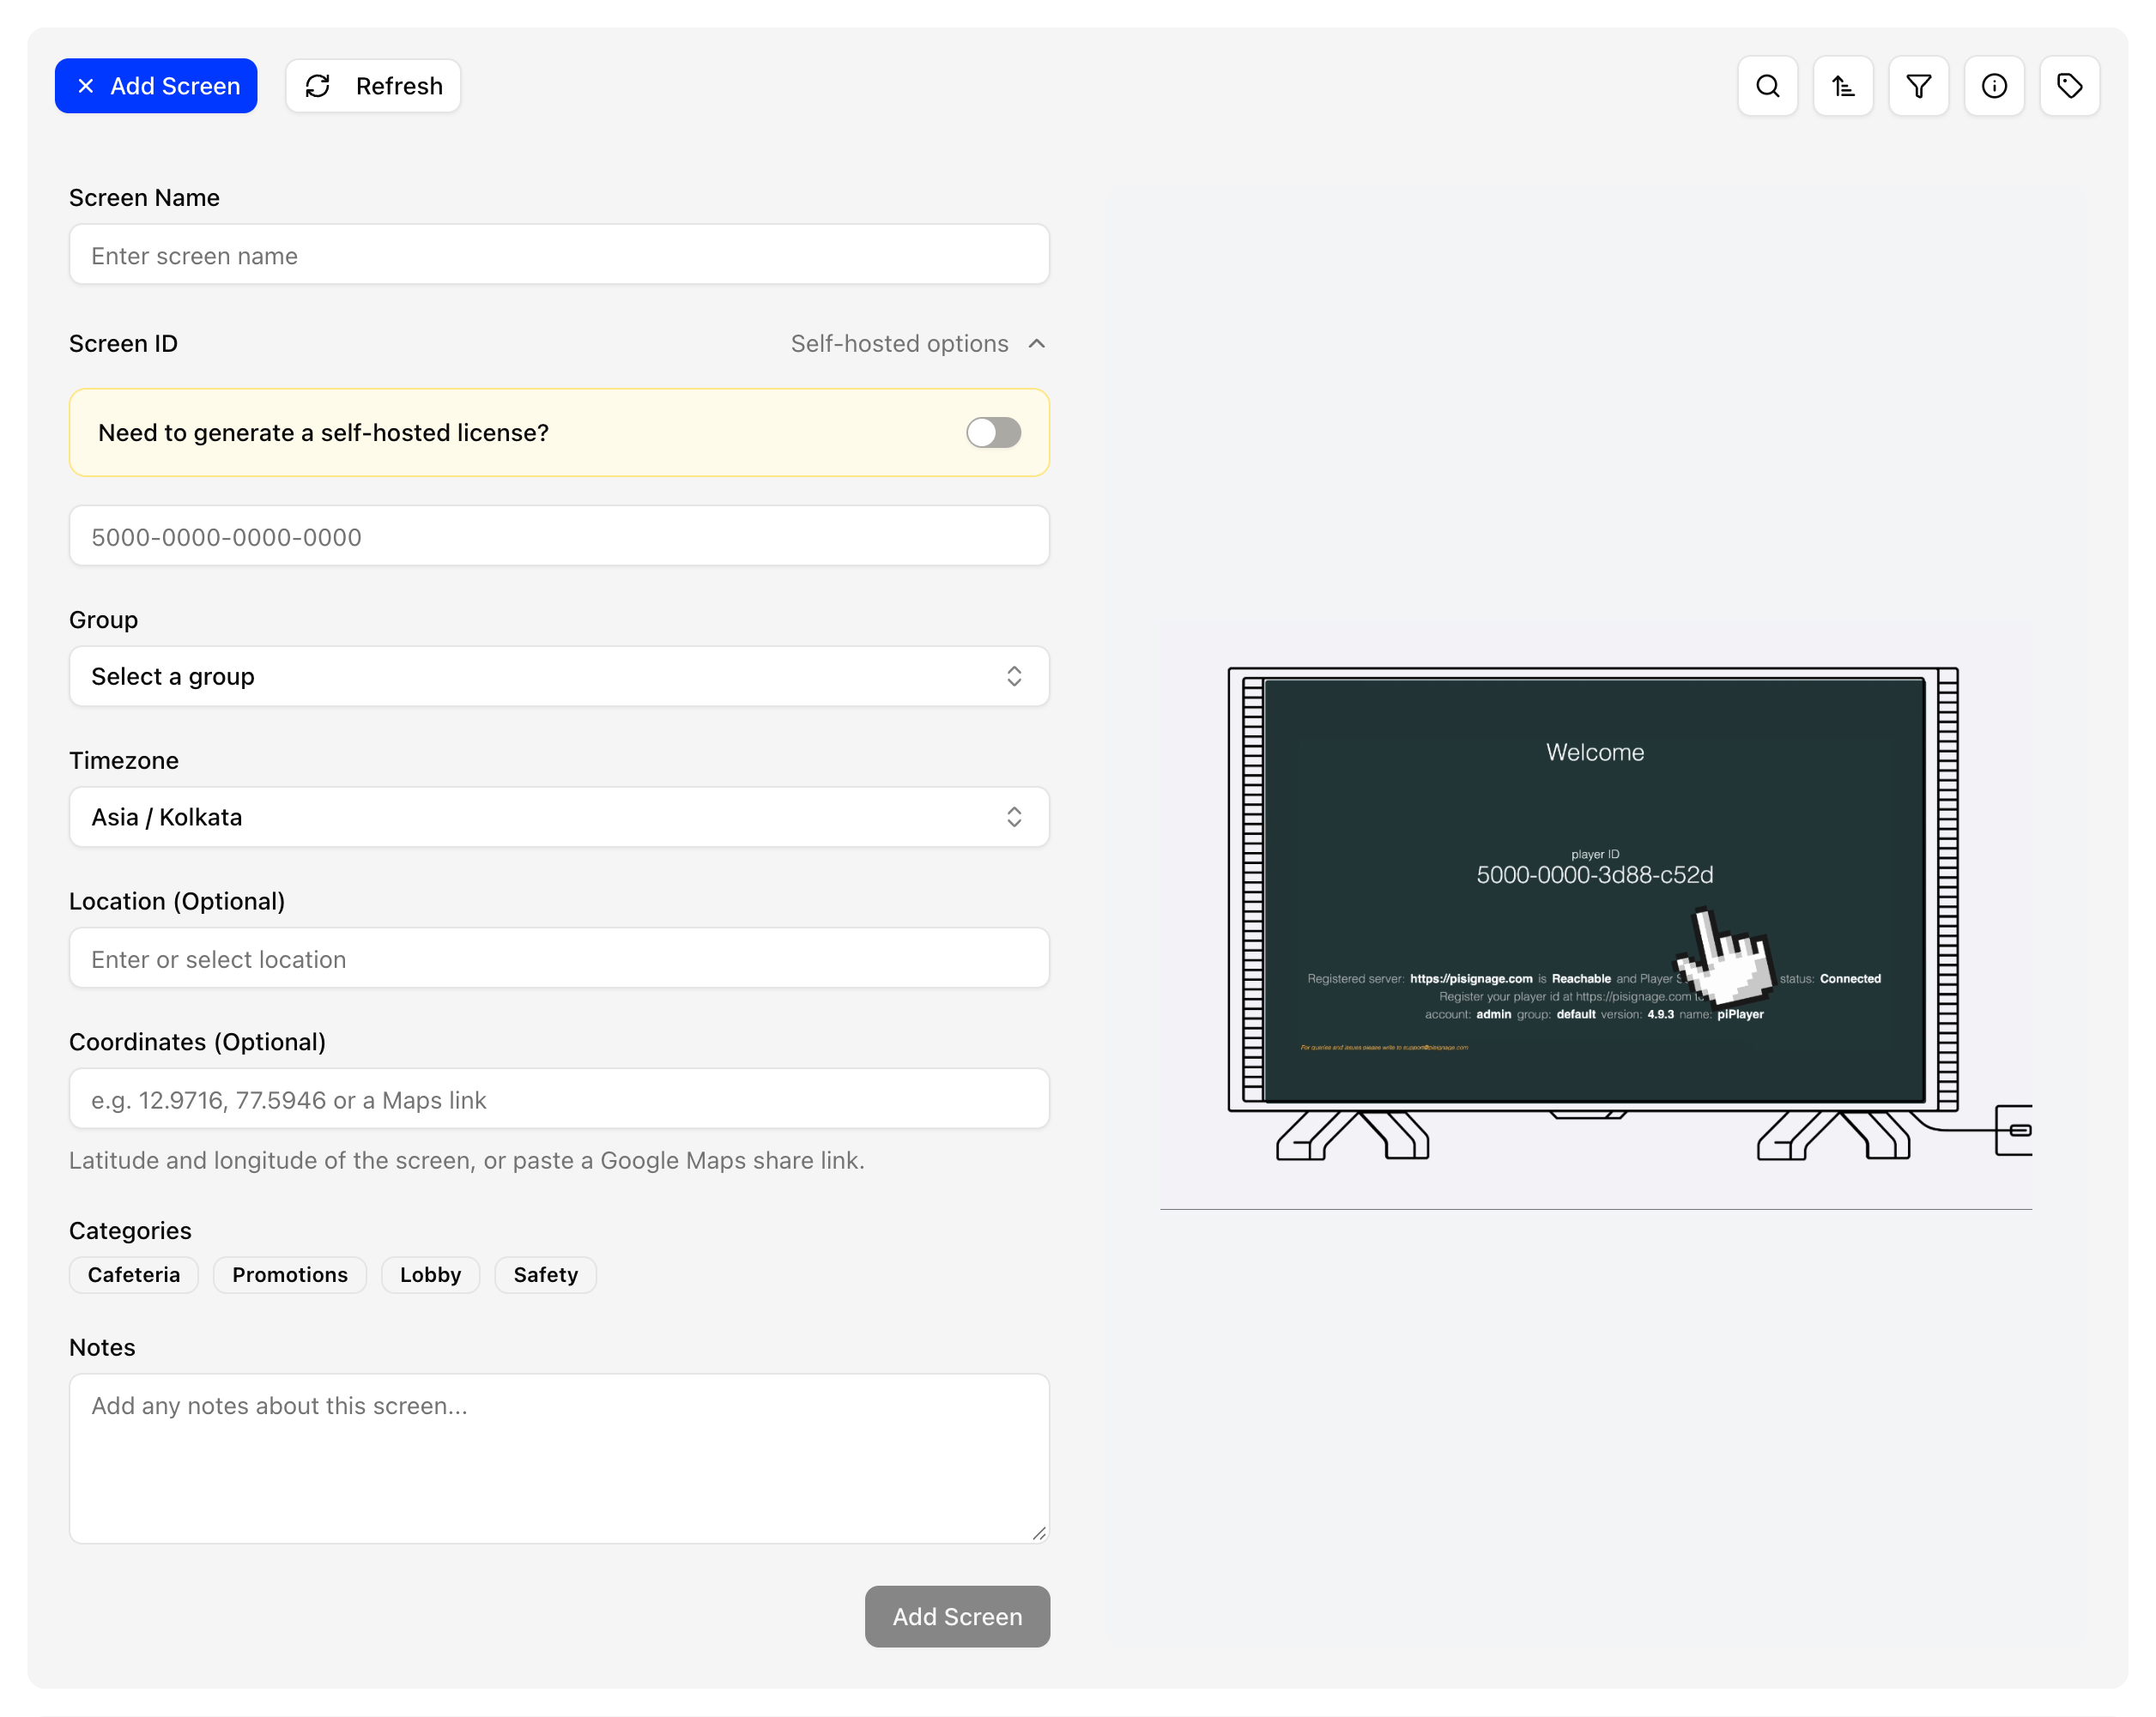
- Enter the Screen ID and click Generate a license.
The license file is emailed to your registered address. Upload it to your local server manually under Settings.
In the legacy UI
- Open the Players tab and click Register.
- Choose managed or license only.
- Enter the player ID shown on the TV, the group, the timezone and a name for the player. A location is optional.
- After registration the player appears under the Players tab with its status.